Want to know how to create a gamepass in Roblox using the updated dashboard? You’ve come to the right place! Whether you are configuring monetization, selling VIP perks, or setting up items for your very own Roblox experience, this ultimate guide will walk you through the entire process from scratch.
Roblox has updated its Creator Hub and Dashboard navigation, making older tutorials confusing and outdated. In this fresh 2026 guide, we break down every single step with clear instructions so you can successfully publish your pass, set your price, and start earning Robux from your games in no time. Let’s dive right in!
Step 1: Access the Official Roblox Website
First, go to the official website at www.roblox.com to log into your account and get started.
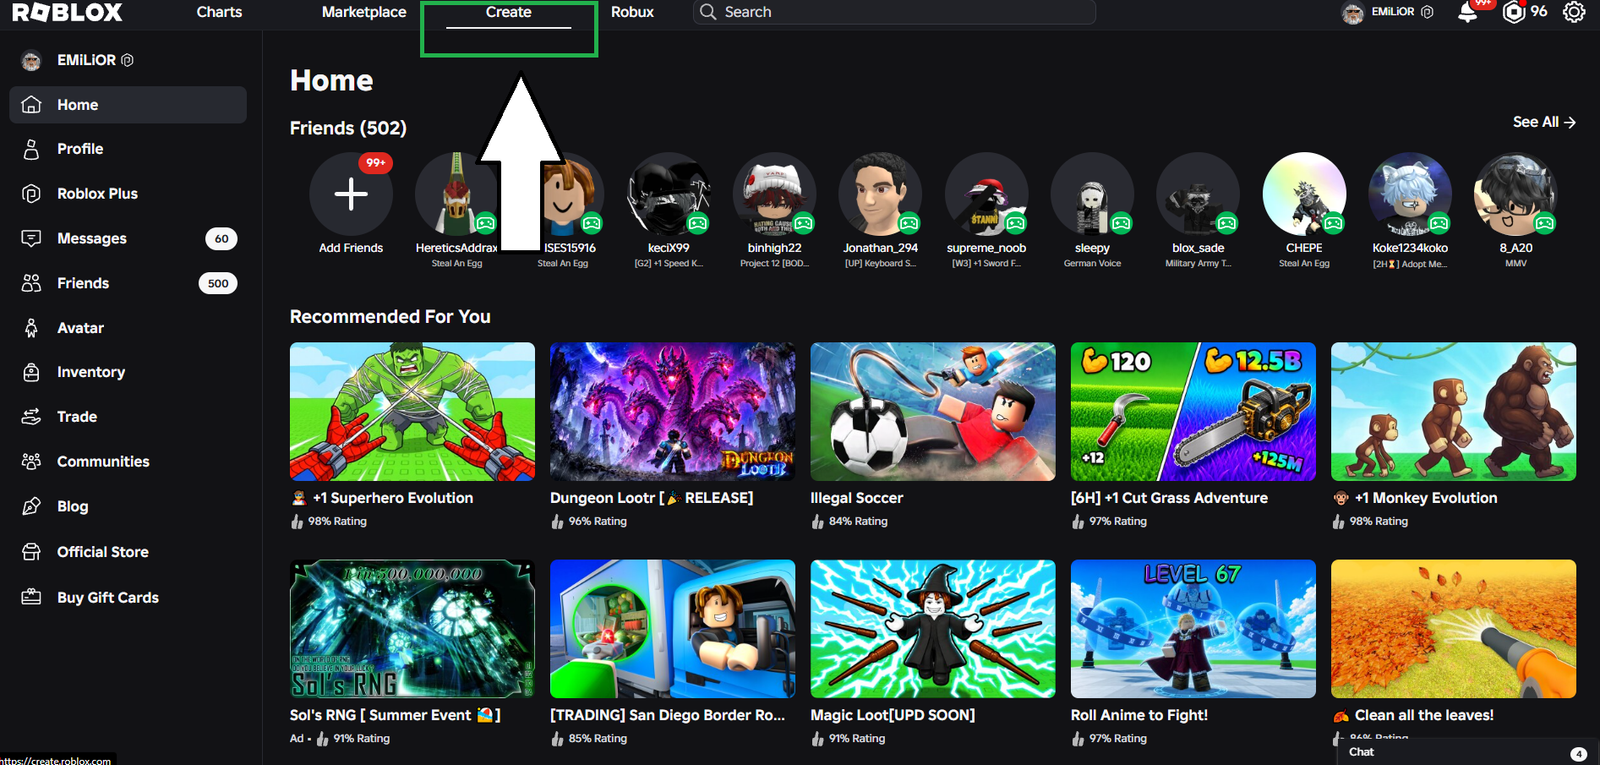
Step 2: Head Over to the Create Section
Click on the Create button located at the top navigation bar of www.roblox.com to access the platform’s creation zone, exactly as indicated in the image below.
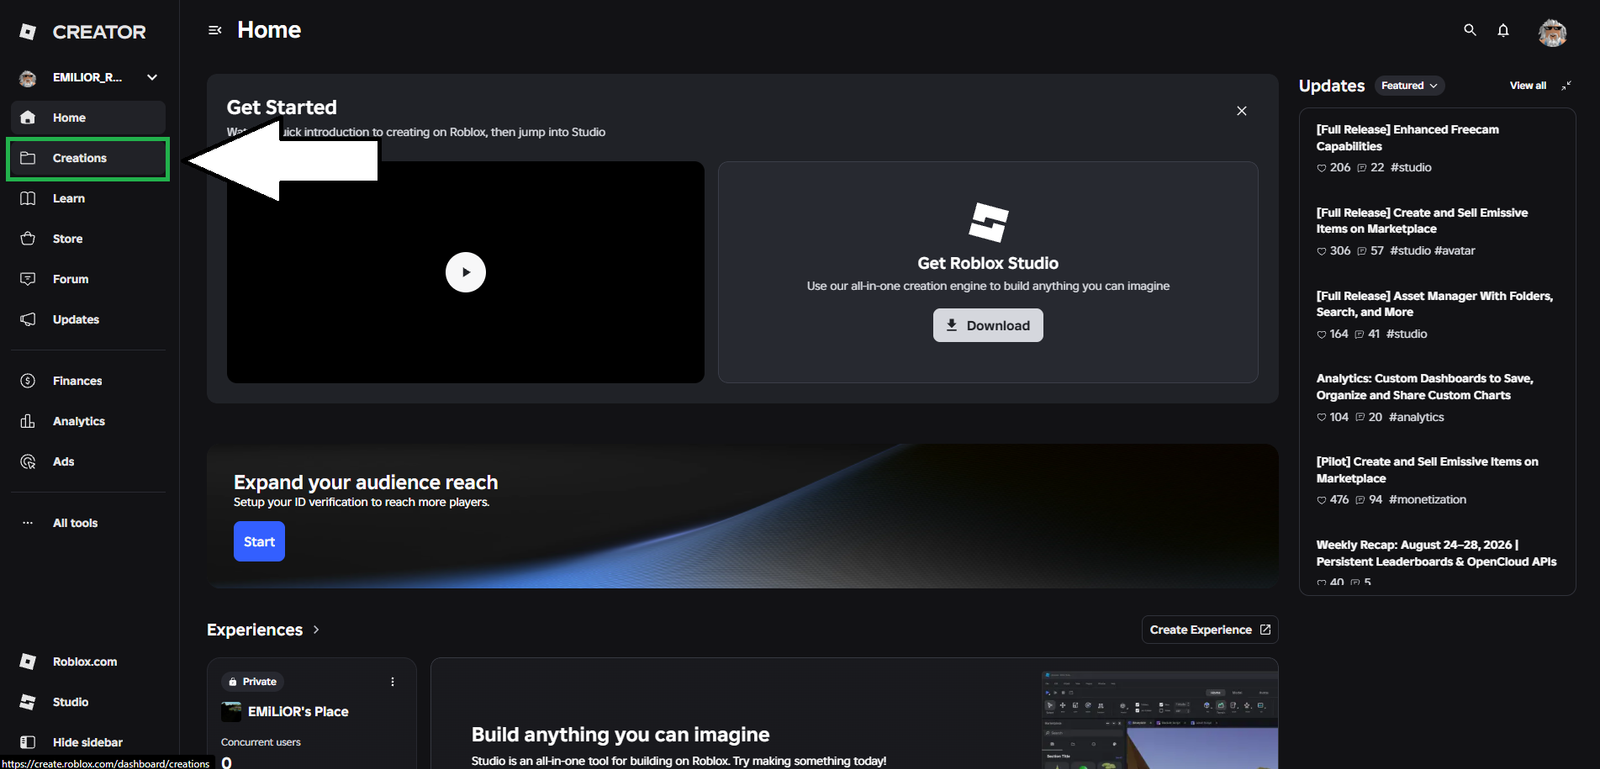
Step 3: Navigate to Your Creations
Once you arrive at the Roblox Creator Hub, click on the Creations tab on the left-hand menu, right below “Home” and above “Learn”.
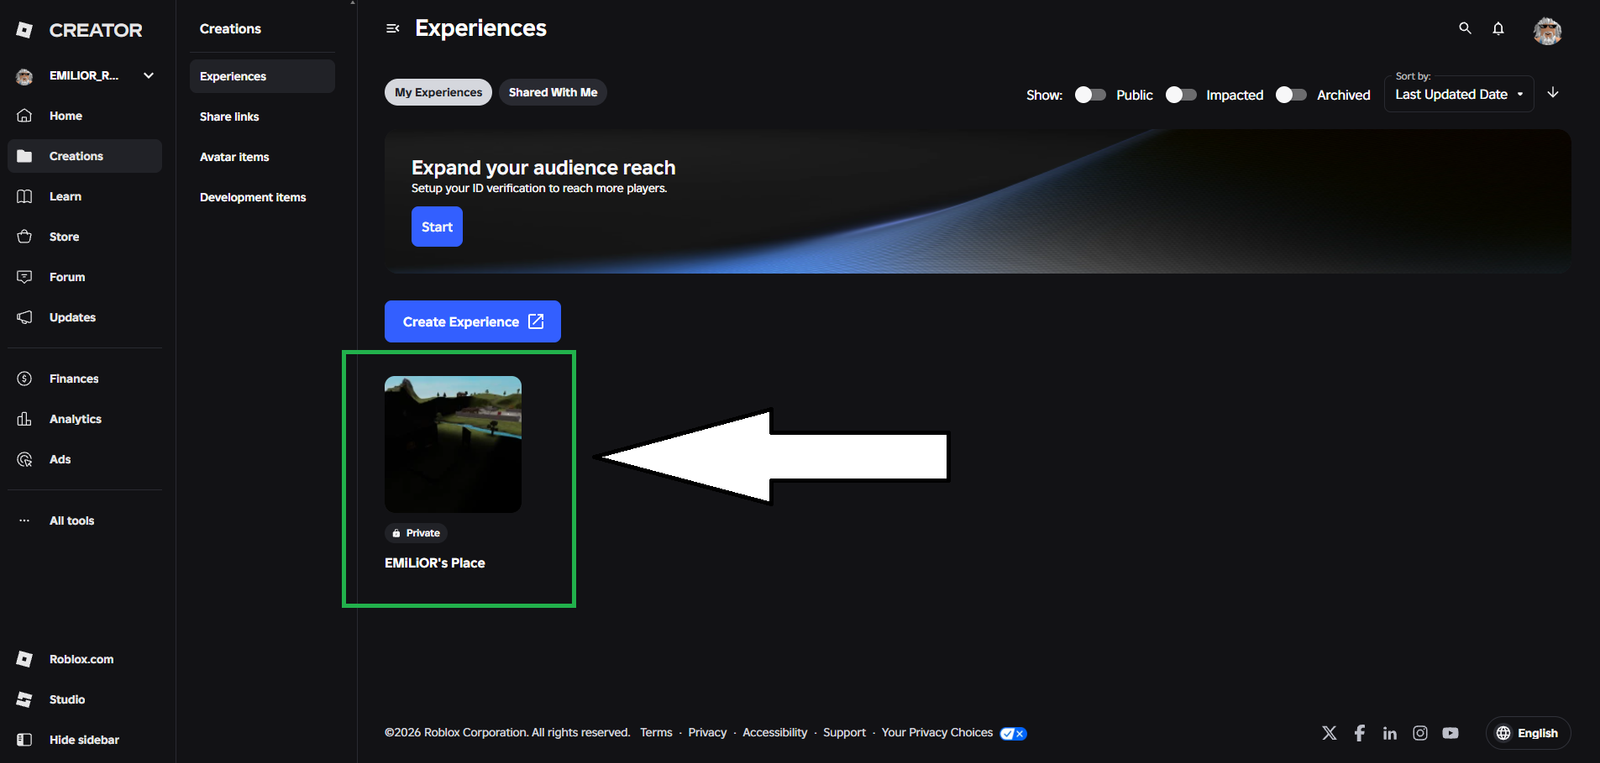
Step 4: Select Your Experience
In this section, you will find your experiences. Every Roblox player automatically has one, but if you are launching a brand new project, select the specific game where you want to create your gamepass. Click on it as shown in the image.
Step 5: Open the Monetization Menu
Once inside your chosen experience dashboard, click on the Monetization tab on the left menu to expand its sub-options.
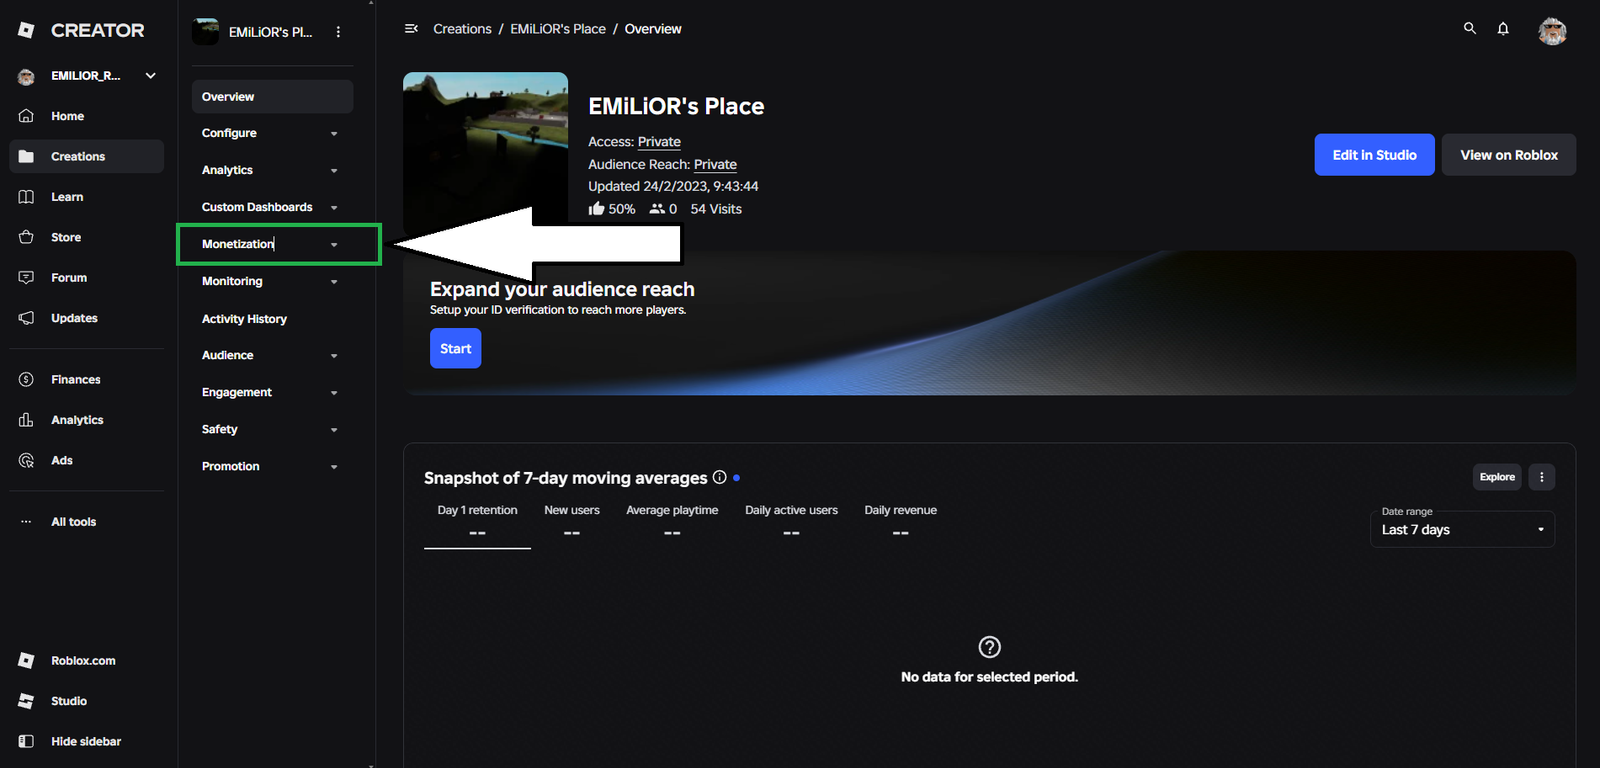
Step 6: Access the Passes Section
In this new drop-down menu, look for the option named Passes further down, right where the image indicates.
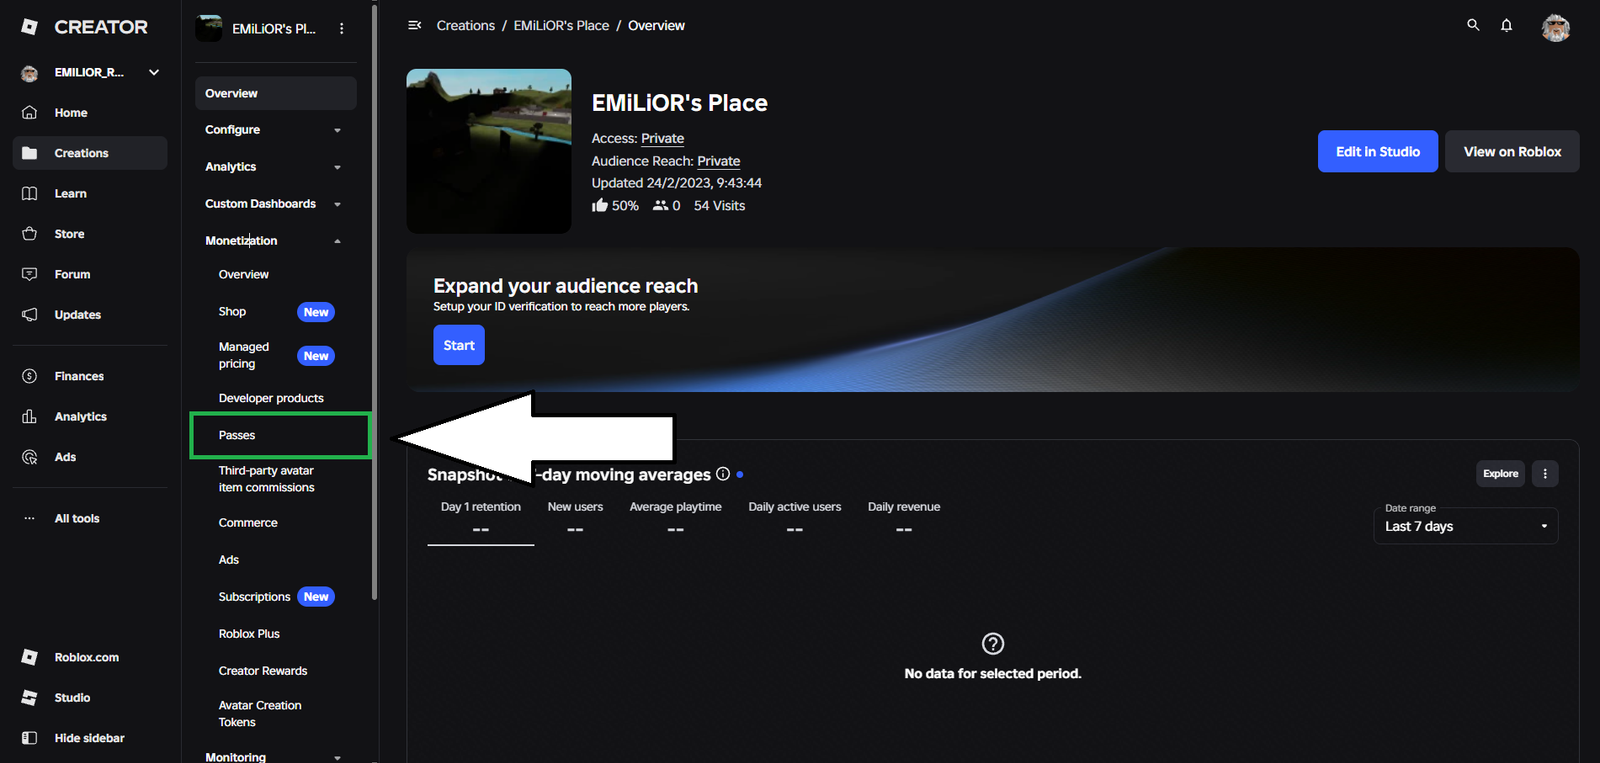
Step 7: Click Create Pass
Once you arrive at the Passes management page, click the blue Create Pass button located in the top right corner of the screen.
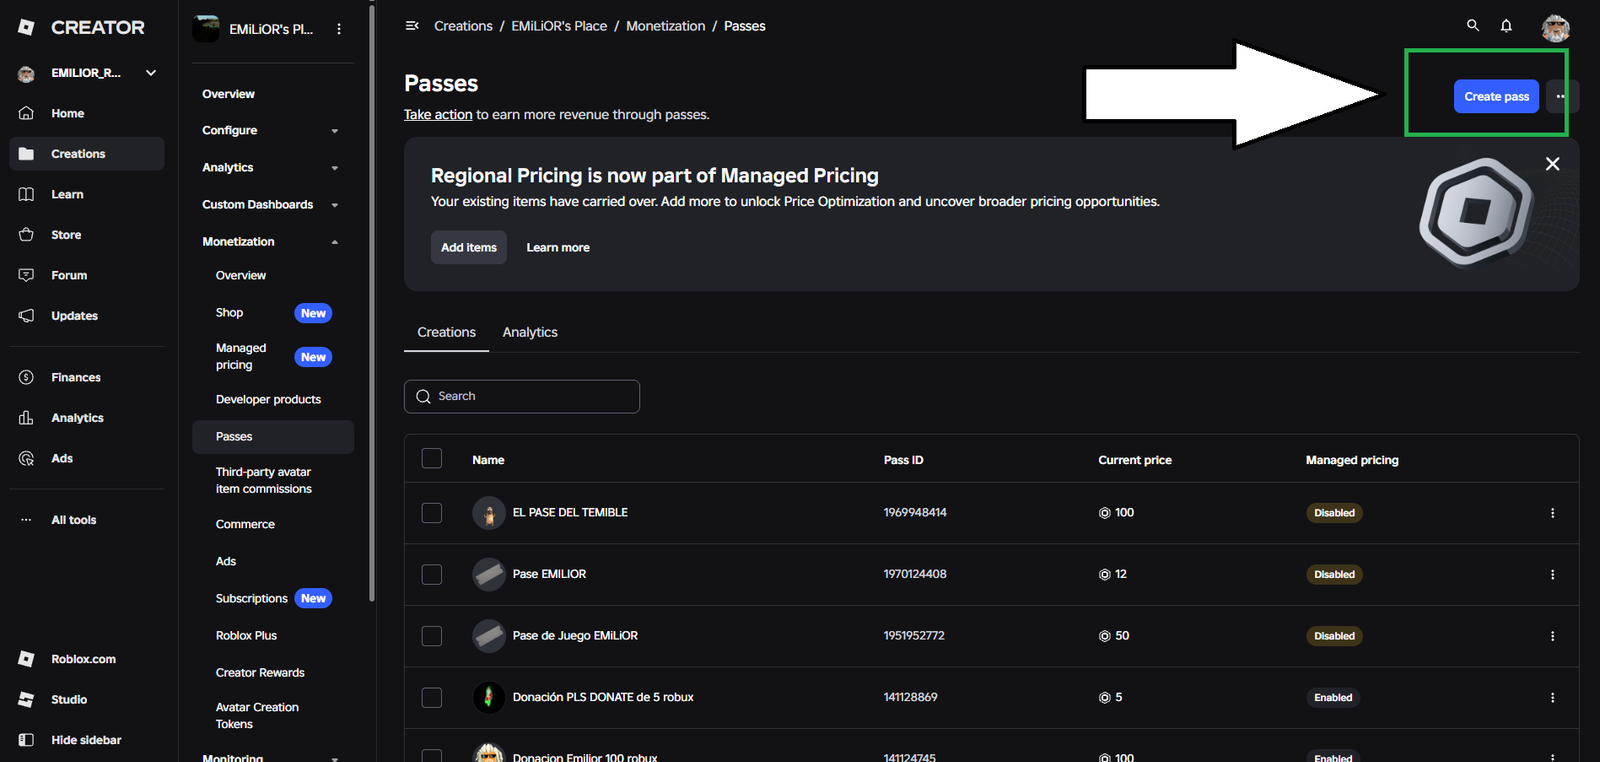
Step 8: Fill Out Pass Details
On the Create a Pass configuration page, you will be able to upload an optional image for your gamepass, set a Name (required), and write an optional description (up to 1,000 characters).
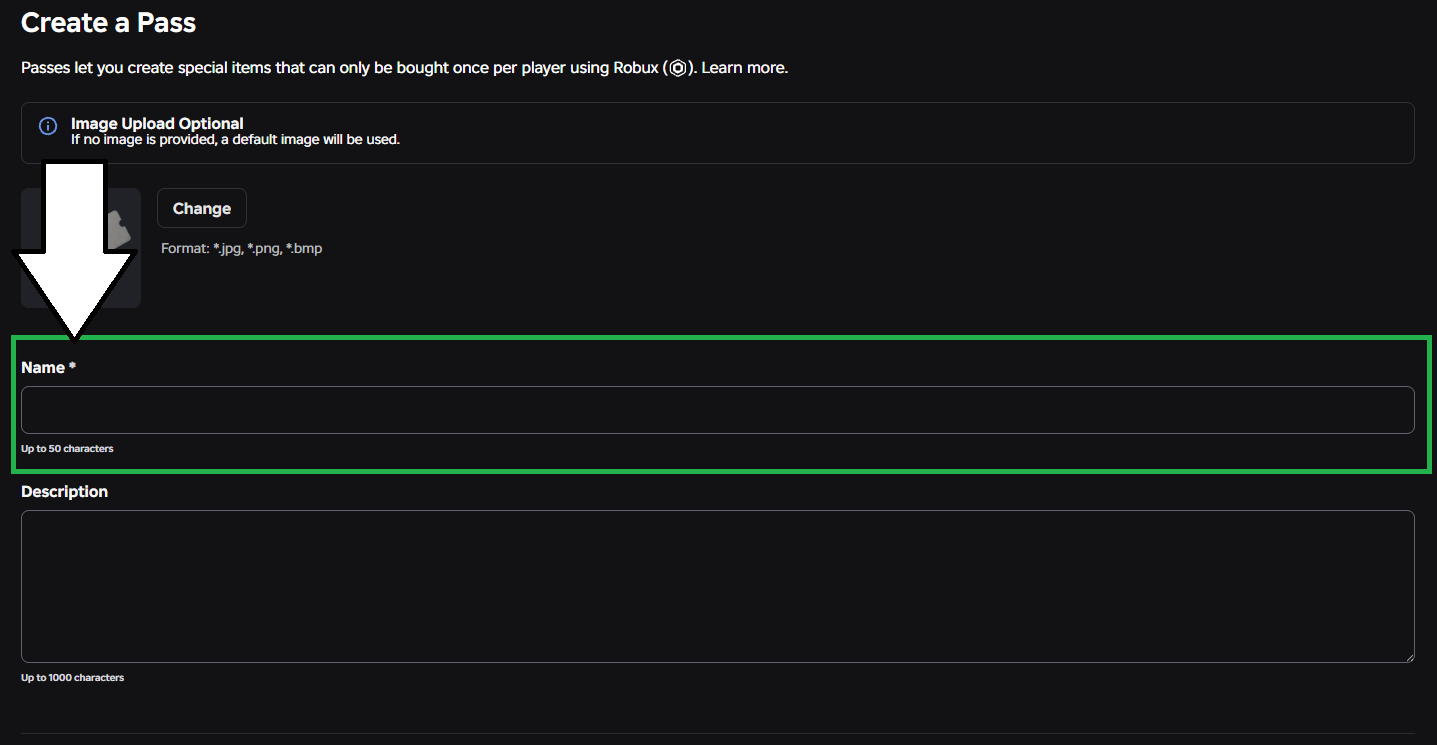
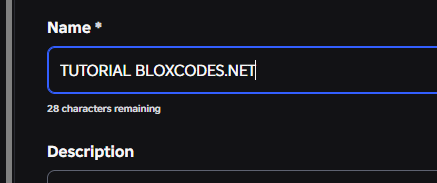
Step 9: Important Naming Warning (No Dots!)
Be very careful when typing your gamepass name: do not use periods (dots) in the title, as Roblox’s filter won’t process them correctly and your pass name will show up full of ugly ##### tags in lists. Keep it clean like in the example image below.
Step 10: Complete Creation
Once you have filled out the requested fields, click the blue Create Pass button at the bottom to officially generate it.
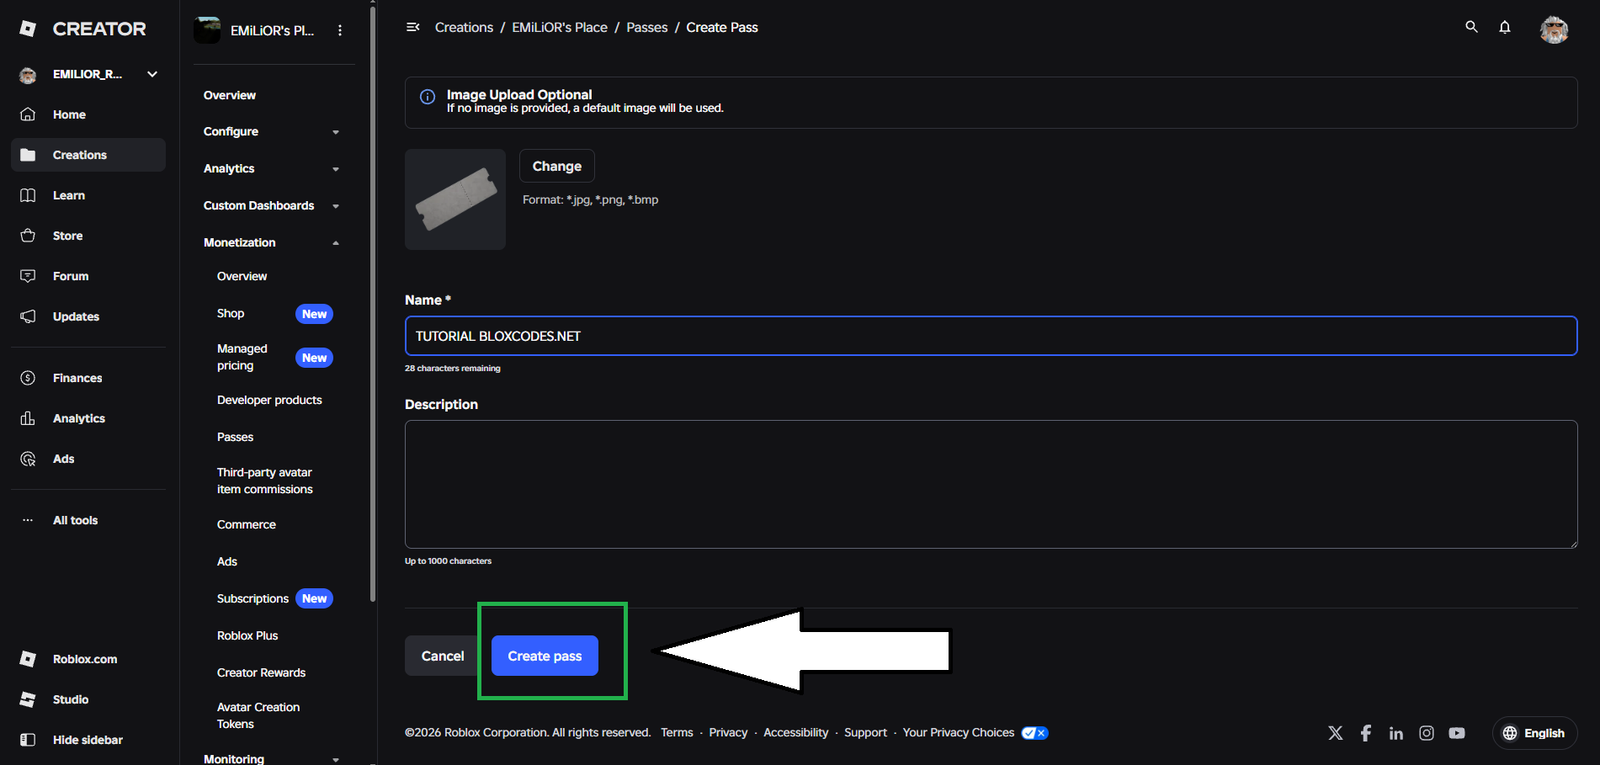
Step 11: Configure Your New Pass
Congratulations, your Game Pass is now created! Next, we need to configure it so it is actually put on sale with a specific price tag.

Step 12: Locate Your Pass in the List
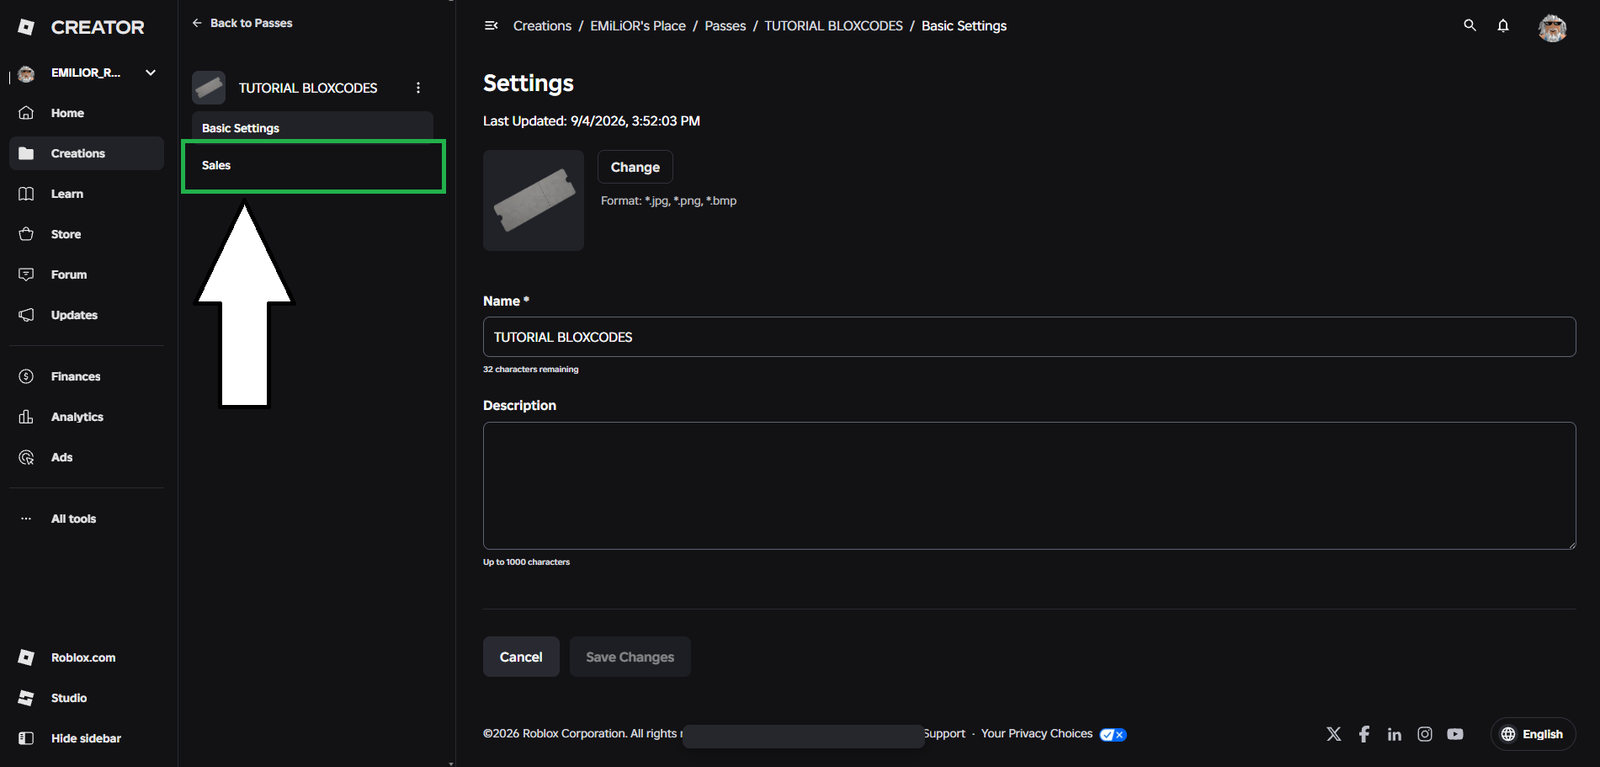
You will land on a list containing all the game passes you have created so far. Locate your newly made pass and click directly on its name to open its configuration settings.

Step 13: Access Basic Settings and Sales
On the left-hand side, look for the Basic Settings menu and click on the Sales tab. This opens up the marketplace options where we can set the price and enable sales.
Step 14: Enable Item for Sale
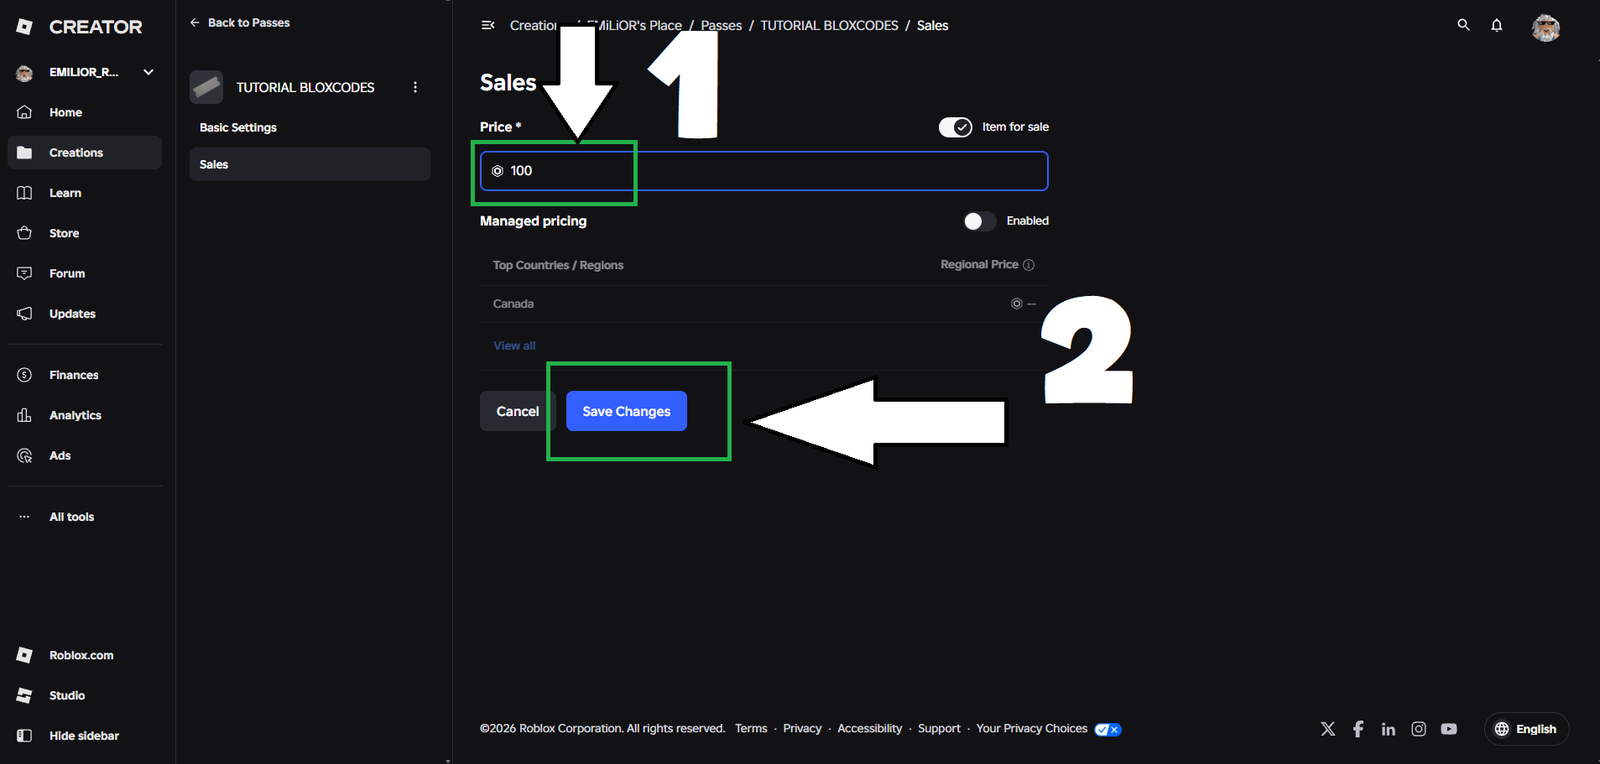
Inside the Sales panel, the first thing you must do is toggle the switch for Item for sale. If this switch is turned off, players won’t be able to buy it, so make sure to flip it on.
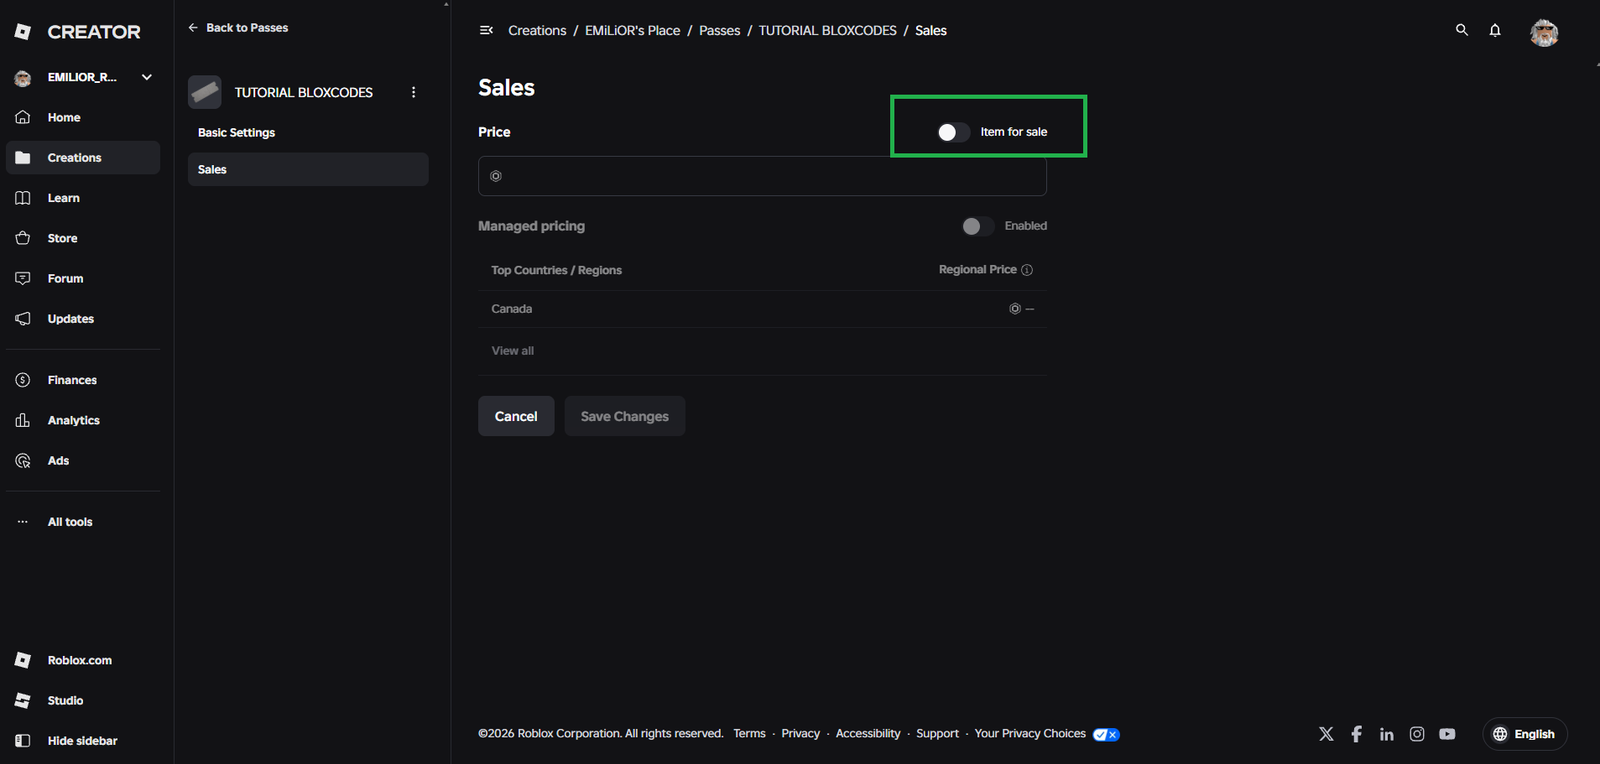
Step 15: Set the Price and Save Changes
Once enabled, type in your desired Robux price (for example, 100 Robux as shown). Finally, click the blue Save Changes button at the bottom to lock in your settings.
Step 16: Configuration Completed
With this final step, your gamepass setup is completely wrapped up and successfully configured.

Step 17: Ready for Sale
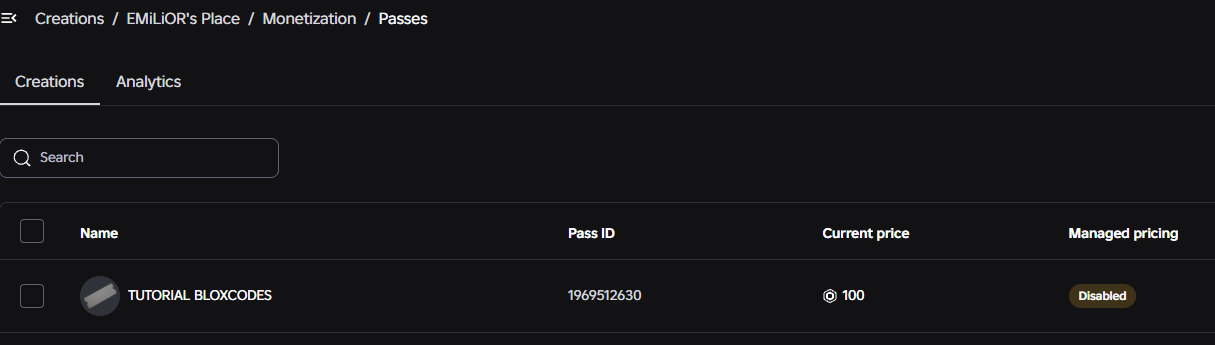
Your game pass is now fully active and available for purchase! In this list, you can verify it is live and easily retrieve your PASS ID if you need it for scripting your game.
We hope this guide helped you successfully create and set up your gamepass. If it did, feel free to share it with your friends, and if you run into any issues, let us know in the comments below! Thanks for reading!
🚀 You’re All Set to Start Monetizing Your Game!
Creating a gamepass is the most effective way to offer special perks, VIP access, or custom items to your players. Head over to the official Roblox Creator Dashboard to manage your experiences anytime. Remember that Roblox takes a platform fee on sales, so price your passes accordingly to get the exact Robux payout you want!
❓ Frequently Asked Questions (FAQ)
How long does it take for a gamepass to appear in my game?
Usually, it appears almost instantly after publishing and configuring the price. If players don’t see it in the store inside your game, have them rejoin the server to sync the marketplace updates.
Do I need to pay Robux to create a gamepass?
No! Creating and publishing a gamepass on the Roblox Creator Dashboard is completely free. Roblox only takes a percentage commission when the pass is actually purchased by a user.